Quantcast Embroidery Digitizing: 2010
Open Directory Project at dmoz.org
Our Service of Digitizing


Are you tired of trying to find the perfect digitizing company?

Welcome to Didu Embroidery Digitizing, Didu embroidery Digitizing is a embroidery punching service company.


Didu Embroidery Digitizing provides the perfect of Service, Quality and Price. All digitizing is performed domestically by a team of AWARD WINNING digitizers.

With decades of embroidery punching experience, our expert in-house digitizers have artistic and embroidery skills unrivalled in the industry. Our state-of-the-art technology and meticulous quality assurance procedures ensure our customers will always receive only tested, first quality design files, tailored for their own embroidery machine.

Didu Embroidery Digitizing is dedicated to helping commercial and home embroiderers express their creativity and develop beautiful apparel and home decorations. Offering a diverse services to meet each customer type needs and with our dedication to customer support, Didu Embroidery Digitizing is the preferred source for custom digitizing today.

* Flat rate of US$2 per 1,000.
* Minimum charge of $5. Maximum Charge of US$150
* 12-24 Hour Turnaround.
* Free format conversions.
* Free editing in most, but not all cases, until you are satisfied.
* Quality guaranteed - you will not pay if you are not satisfied.
* Supply a scan of the sew-out with every digitized design.

If you want to contact us, If you'd like to contact us, please email us at :

Didu Embroidery Digitizing

Please visit our website at :

http//www.digitizing88.blogspot.com


Thank you for visiting Didu Embroidery Digitizing - We will exceed your expectations. We guarantee it.

Custom Embroidery digitizing means you send us a picture or image as an artwork and we convert that picture in to stitches. Our professionals provide fast turnaround for any custom embroidery digitizing to all clients. We are so sure of the service and quality, we offer a free trial as well. You can send a small logo or a picture of an animal, human, scenery, construction. In fact anything that you can think of and we will do the job with perfection!

Didu Embroidery Digitizing is a group of professional digitizers and designers that cater the embroidery Industry. Serving and digitizing / punching custom designs for garment manufacturers,promotion companies, embroiderers and digitizers themselves.


Choosing Needles For Your Knitting Project

Posted on 7:21 AM | By Didu | In , , ,


Knitting is an art from using yarn or thread to create various pieces of cloth ranging from sweaters and blankets to gloves and socks. With the use of loops and stitches strung between two needles, the cloth takes shape both by hand and by machine. Different products are made by using various types of yarn and needles, thus creating many colors, textures, and sizes.

Yarn and needles are the only absolute fundamentals of kitting. Many options are available when it comes to choosing a pair of knitting needles. For starters, you may have straight, circular needles, double-pointed, or cable needles. Straight needles are perhaps the most common type of knitting needles and will be used for a majority of basic knitting projects.
There are several things to consider when using knitting needles as well. Wider needles will produce larger loops and stitches while smaller ones will give a tighter, more compact stitch.
You will find that knitting needles are generally made out of four common materials, those being metal, wood, plastic, and bamboo. The wood and bamboo needles are rougher, therefore offering more traction and ensuring you are less likely to drop stitches. Metals needles are great for smooth, quick knitting as the yarn will slide much easier over the surface.
Straight needles are most often used for flat knitting such as blankets or scarves. They produce straight, even rows. Circular knitting needles, long and flexible with a double point, are used for flat or circular knitting. Straight double-pointed needles are also used for circular knitting but used to achieve a smaller tube such as for a collar or sock.


There you may also store something known as a needle gauge which will help you determine the size of each knitting needle.
Executive Summery by E. Sullivan

The Right Embroidery Needle Size .!, How to Choose it?

Posted on 8:44 AM | By Didu | In , , ,


If you are attempting to learn embroidery, the first step is to know how to choose the correct embroidery needle for your project.  The correct embroidery needle prevents the fabric from being snagged or entangled.  It also prevents the thread and needle from breaking, allowing you to work faster and cleaner.
Here are some tips to help you choose the right embroidery needle for the task.
  1. Know your fabric.  Determine first whether you will need a blunt or sharp needle by knwoing your embroidery fabrics.  Tight weaves such as cotton and synthetic blends tend to need sharper needles.  On the other hand, loose weaves like needlepoint canvas and linen will need a blunt needle. Note that tapestry needles have blunt points, while chennile needles have sharp points. 
  2. Know your thread They sized of the thread will help you determine the size of the needle's eye that you'll need.  As a rule, the smallest possible eye is often used so as to avoid having large holes in your embroidery collection.  Embroidery yarn is usually used with crewel embroidery and needlepoint.  Pearl and embroidery floss are typically used in cross stitch projects.
  3. Know what you're doing.  Knowing the type of project you intend to do will also determine the size of the embroidery needle you will be using.  Typically, thicker projects will need longer needles.  Counted cross stitch and needlepoint will normally need a blunt tapestry needle.  Embroidery needles are used for stamped cross stitch and floral embroidery. Crewel projects will need either crewel or embroidery needles.  A beading needle is best for attaching beads to other fabrics or embroidery work.
  4. Know your needle Once you have determined the fabric, thread, and project you will be using, you can start picking the size of your embroidery needle.  Note that embroidery needles have a longer eye, a feature that differentiates them from other sewing needles.  The longer eye also makes it easier for threading the needle.  As stated earlier, you should always use the needle with the smallest eye to avoid damaging your project.  The size of the eye becomes smaller as the number goes higher. A No. 13 needle is generally used for sewing the thickest yarns onto a rug canvas.  A No. 28 needle will be better for very fine point work on gauze canvas.  Some embroidery fabric, like needlepoint canvas and cross stitch fabric, have a gauge or count.  This tells you the size of the openings within the fabric.  The lower the count, the larger the openings.  Larger openings would mean it is best that a thicker yarn or needle be used on it.  10-count fabric would use a No. 18 needle, for example.  Meanwhile, a No. 22 needle will be just right for 18-, 20-, and 24-count fabric.
There are really no hard or fast rules in choosing the right embroidery needle size for your project.  While at times some needles are labeled for a specific use, feel free to try different needles to see if it will work well for you project even if at first it does not seem to be the proper needle for it.  Experiment to see what works best for you. 
By Staff Writer


How Do Computer Embroidery Machines Work?

Posted on 9:56 PM | By Didu | In , , ,


    Select and Input Design

  1. Computer embroidery machines work off a programmed digital design that is either submitted to the machine's computer or transmitted to the machine from an external computer. The design must be within the size that the machine is capable of producing and in a format that it recognizes. In many cases, the design is programmed directly into the computer embroidery machine either through a memory card or computer disk, but some machines connect directly to a standard laptop or desktop computer.
  2. Prepare Thread and Fabric

  3. The fabric is placed on an embroidery hoop that fits onto the machine. The hoop is similar to a standard hand embroidery hoop, except that it is designed to fit onto a special arm on the machine. The fabric must be taut in the hoop. In most home computer embroidery machines, only one thread color is used at a time. After the embroidery design has been transmitted to the machine, either the machine will indicate which color thread it will use first or the user will tell the machine which thread color has been placed on the machine.
  4. Monitor Progress

  5. Once the fabric and thread are in place, the machine begins its work, following the design it was given. The computer, either in or attached to the machine, directs the embroidery arm. The embroidery arm moves the hoop in the directions needed to complete the pattern. Since most home computer embroidery machine models can embroider only one thread color at a time, all of one color will be embroidered according to the pattern. Once a color is complete, the machine will stop so the user can switch to the next color. 
by carlye jones

How to Select the Correct Needle

Posted on 7:23 AM | By Didu | In , ,


Recommended needles

Canvas 75/11 light ball point
Caps 75/11 or 80/12
Corduroy 75/11 Sharp or normal round
Cotton 75/11 light ball point
Denim 75/11 light ball point
Fleece 75/11 light ball point
Leather 75/11 or 80/12 light ball point (On stiff or spongy leather)
70/10 or 80/12 (On soft supple leather)
Lycra 70/10 Medium ball point
Nylon 75/11 light ball point
Satin 75/11 light ball point
Sweater 75/11 light ball point
Sweatshirt 75/11 light ball point
T-shirt 75/11 light ball point
Towelling 75/11 or 80/12 light ball point
Waterproof fabric 80/12 sharp or light ball point Teflon

Needle Coatings

Needles can be treated with special finishes to increase their performance.
The most common is a non-stick finish designed to reduce the effects of friction when stitching with synthetic threads.As the needle passes through synthetic materials, as does synthetic thread as it passes through the eye of the needle. This motion can snap threads and cause the material to stick to the needle. The non-stick coating helps to dissipate the heat.
There is another coating called Titanium Nitride. It lasts at least four times as long as the standard chrome needle before the point is damaged.
Non-Stick Finish Titanium Nitride Finish
Recommended use Synthetic threads, fabrics Any application, especially good for tough, dense fabrics.
Function Dissipates heat.
Decreases thread breaks.
Prevents material from sticking to needle. Strengthens needle.
Runs cooler
Drawbacks Extra cost.
Finish may wear off before the needle wears out. Extra cost

Selecting the correct needle point 

This can be critical to creating good quality embroidery. There are two distinct point types used in the embroidery industry.
The first is ‘sharps’ also known as round or normal points. These work well on woven fabrics.
The second style is the ‘ball point’, which should be used on knitted fabrics as it will not pierce and damage the fabric.
The smallest needle possible should be used for the job. For example, for fine knit goods such as T-shirts use a thin ball point and for coarse knit goods such as sweaters use a medium ballpoint.
It is a good idea to try a variety of needles and see which works best for you.

Needle Systems

There are several different systems of embroidery needles each having varying characteristics.
The most commonly used is the DBxK5. This has quite a large eye, around 25% larger than an ordinary, which allows an easier passage of embroidery thread including metallic threads. The only disadvantage to this is there is less metal on the needle tip so it is weaker. It also has an enlarged groove which guides and protects the thread better, this reduces friction when the needle enters the fabric and so reduces the total amount of thread breaks.
The 287WK has a shorter point, this is useful for producing a design with long stitches or a thick backing. The needle will exit the fabric and backing sooner and move more neatly to the next stitch.
The 16x231 is more of a standard needle from which others are based.

Needle Breaks Problem Solution

Improper Timing If needle point and hook point are not timed properly, damage to both could result. Replace damaged parts and re-time machine
Needle incorrectly inserted Make sure it is fully in the needle bar shaft, it is rotated properly and the needle screw is tight.
Bent needle/damaged point Always replace a needle if it hits or even grazes a frame or other hard object
Dull Needle Dull needles will bow in an effort to push through the fabric causing fabric to pucker and eventually break They should be replaced.

Thread Breaks Problem Solution

Burrs in the needle eye, thread guides, throat plate or hook Replace needle. Use fine grade emery cloth or emery cord to buff thread guides and throat Plate. Buffing hook may alter timing, replace damaged hook.
Needle size is too small for thread. Change to a larger needle or a thinner thread.
Bent needle/damaged point Usually happens after needle hits the frame, throat plate or hook. Check the hook for burrs and timing after hitting hard object. Replace the needle.
Incorrect needle depth This occurs after hitting the frame or throat plate. The thread will start to split and one ply will continue to sew while the other peels back. The thread will eventually break, leaving previous stitching thinned out. Re-set needle depth and possibly timing. Check needle for damage.
Needle too close to hole in throat plate This causes thread to fray and eventually break. Adjust throat plate and/or needle position.

What are backings and toppings?

Posted on 11:49 PM | By Didu | In , ,


Backings and Toppings
 

There are a variety of backings and toppings available, each having different qualities, making them suitable for various fabrics.
They provide a base strength for the embroidery giving designs stability and preventing fabric distortion. This is especially true when embroidering a fabric with stretch.
Water Soluble
These  are used more frequently as a topping for fabrics that are difficult to handle or have a surface pile. By placing the water soluble topping over the fabric the texture of the weave and pile is disguised. This stabilises the stitches and stops designs from distorting.
It can also be used as a backing for items where the back will be seen, but the design still needs stabilising.
Tearaway Backing
This is one of the cheapest and most commonly used backings. It is usually a non-woven fabric that can be torn in all directions. It is available in black or white, soft or hard.
Wax Paper
This is used mainly as a backing for fabrics that grip or are heavy. The use of the wax paper makes the frame slide with greater ease and is especially useful on leather as it tends to have a grip on the sewing field.
Organza
This is a very strong and supple sheer that is used as a backing. It leaves the embroidery flexible and preserves the natural look of the fabric.
Burn-away Backing
This is a natural backing that burns away rather than melts; care must be taken when exposing the fabric to heat. Over exposure will cause the filaments to break up and blacken, they can be difficult to brush away and will mar the finished product. more detail.

Embroiderer's Guide to Digitizing in Density

Posted on 3:20 PM | By Didu | In , ,


What is Density?

Density is the distance between individual stitches in a satin column or rows of stitches in a fill.

How is Density Measured?

There are two primary ways that embroidery and digitizing systems measure density.
Why Density Can Be Confusing
Because we are measuring space between stitches, the smaller the number the more dense the stitching. A reasonably average value for density is .4 to .45.

Where is Density Used?

Density only applies to satin and fill stitch objects and underlay. With satin stitches, the narrower column have less density than wider ones. Sample densities for underlay may be between 2 and 4 mm. Running stitches do not have density.more detail read here.

How Density Affects Your Embroidery

Light densities provide less coverage. Lower density designs sew faster and stress the fabric less. High densities, especially when combined with short stitches, contribute to stiff, thick-feeling designs. When densities are excessive, you can experience increased thread breaks, broken needles, fabric damage, design distortion, and longer sewing times.

Note: Increasing density provides better coverage up to a point. The perfect combination of density and stitch length covers the fabric adequately without creating a "bullet-proof patch." Unfortunately, "perfect density" is relative and depends on the fabric, the color of the fabric relative to the design, and the embroiderer's personal preference.

How To Control Density

Avoid the temptation of dramatically increasing density on letters, especially when working with very small letters. If you are using stock designs, you probably have little, if any, control over initial density settings.

The above executive summery By Lindee Goodall

Custom Embroidery Tips

Posted on 7:17 AM | By Didu | In , ,


Custom Embroidery Tips

In order to create a high quality embroidery product, there are a few basic, but significant components that you have to watch out for when creating your own embroidery technique.
The Thread:
The two main types of embroidery threads are Polyester and Rayon. The color of the thread also has to complement the colors in the embroidery design, along with the color of the fabric.
Stitches:
Fill-stitches form different patterns and stitch directions, and cover large areas. Too many stitches will create small gaps and too few will show through the design. Keep in mind that fabric tends to absorb small stitches, so they should be avoided.
Underlay stitches, though often overlooked, plays an important part in the final embroidery quality and design. The method in which underlay stitches are sewn into the material also paves the way for the top stitches.
Backing Materials:
Backing materials like Cutaways and Tearaways should be chosen according to the type of garment or fabric used.
The Topping:
Toppings prevent fibers from getting caught in between stitches on some rough textured fabrics such as Fleece.
Locations:
The most noticeable area of the garment should be chosen as the central location of the embroidery design.

Executive Summery By George Royal

Embroidery Technique

Posted on 9:38 PM | By Didu | In , ,


Applique - A separate, pre-cut piece of fabric that is decorated (or decorated and then cut), and applied to another piece of fabric, typically a garment. Appliqués are frequently used to reduce overall embroidery stitch counts, execute reproductions of which embroidery is impractical and decorate substrates difficult to embroider directly.

Backing - Typically non-woven material (sometimes referred to by brand name 'Pellon') applied beneath material being sewn to increase fabric stability and support stitches. Available in both tear-away and cut-away styles of various weights, backing is generally hooped with the substrate or otherwise positioned between substrate and embroidery machine throat plate prior to stitching.

Birdnesting - Typically caused by inadequate top-thread tension, top thread not following thread path, or up-and-down substrate movement under needle (see flagging), birdnesting describes an accumulation of thread between substrate and needle plate, and can result in restricted or irregular substrate travel.

Bobbin - Spool or reel that holds bobbin thread (or 'under thread') in bobbin case. Bobbin thread works with upper thread to create stitches.

Buckram or buckram lining - Heavy woven material, stiffened with glue or other substance, commonly found inside the crown of certain caps, used to lend shape to the cap; sometimes useful as substitute for other backing.

Chenille - Type of embroidery-commonly found in appliqué and athletic applications-characterized by a design surface comprised of heavy loops of thread; sewn with heavy threads or yarns, chenille is created on specialized embroidery equipment.

Column - Typically used to form borders around fill areas and for rendering text, the column stitch consists of closely spaced satin stitches.

Complex fill - Similar to standard fill, technique that allows digitizer 'knock out' area(s) within fill, creating openings or negative space (visualize Swiss cheese).

Condensed format - Digital design-storage format that allows for less limited (than expanded format) enlargement or reduction in size, scale, stitch length and density in a digitized design (within stitch-type limitations), due to proportional number of stitches being placed between pre-defined points, rather than individual stitches being assigned specific sizes; may not be read by all embroidery machines (see also expanded format).

Digitizing - Historically (and colloquially) referred to as punching, the digital means of converting artwork into the vector commands-readable by an embroidery machine's computer-that determine needle penetrations, color changes, stitch characteristics, start and stop points, etc.

Digitizing tablet - The platen or surface on which original art to be digitized is placed; holds the artwork flat, allowing digitizer to specify various design characteristics (see digitizing) by 'tracing' and otherwise designating them with a digitizing 'puck' (input device similar to a computer mouse).

Editing - Limited form of digital design manipulation that typically allows user to edit stitches or blocks of stitches, incorporate text, scale up or down, reposition design elements, add, delete and modify machine commands, etc.

Emblem - Commonly an insignia, crest or patch-often applied via appliqué-characterized by a finished, sewn border that contains text and/or design elements.

Embroidery - Decorative sewing on fabric or other substrate that incorporates design elements, text or other recognition, commercial or promotional graphics; originally executed by hand, embroidery has evolved through various stages of technology to its current state of computer-driven, multi-head, multi-color embroidery machines.

Expanded format (see also condensed format) - Digital design-storage format that assigns individual stitches specific sizes; selection of this format typically restricts user's ability to scale a design up or down because stitch counts remain constant regardless of final design size.

Fill - Large design area typically covered by series of running stitches, the pattern of which may be varied in terms of stitch length, angle and density.

Finishing - Any of a number of procedures-thread trimming, removal of excess backing or topping, spot or soil removal or steaming to remove hoop marks-that are performed between completion of embroidery and packaging for customer.

Flagging - As needle moves up and down, substrate may also move up and down against the machine bed (resembling a waving flag), causing birdnesting and poor design registration; typically due to poor presser-foot adjustment or improperly stabilized fabric.

Hook or rotary hook - A circular device which spins around the bobbin case with a pointed arm protruding from its body-the hook; is instrumental, in concert with the needle and upper thread, in forming stitches.

Hook timing - Proper synchronization of hook's rotary and needle's up/down movement; necessary to form stitches.

Hoop or frame - Device used to stabilize the fabric in that area of substrate to be embroidered; typically composed of two concentric, wood or plastic rings, the inner of which fits tightly within the outer-with the fabric in between-stabilizing the fabric and holding it in close contact with the machine bed during embroidery.

Hooping aid or hooping station - A device used to aid in the hooping process, generally by holding the substrate and/or hoop as the rings are engaged, in order to enhance hooping efficiency and consistency.

Lock stitch - Sometimes referred to as a tack or lock-down stitch, it is typically found at the conclusion of elements such as fills and columns, or prior to color changes or stop points.

Looping - Erratic stitch construction-often due to improper top-thread tension-resulting in loops on the surface of the embroidery.

Monogram - Sewn or embroidered design consisting of stylized letters-typically three or fewer-that represent the initial(s) of a person or organization.

Needle - Slender piece of steel with a point, ball, taper or other shape on one end-to facilitate penetration of various fabric types-and a nearby hole (or eye) for thread to pass through.

Nippers - Small, scissors-like cutting tool specifically designed for thread trimming, during finishing of embroidery

Pencil transfer - Least expensive 'proofing' method performed by lightly rubbing a soft-leaded pencil on tracing or tissue paper placed over embroidery sample.

Puckering - Gathering of fabric due to its tension being less than that of stitches; typically due to improper thread tension, inadequate hooping or inappropriate backing.

Pull compensation - Deliberate distortion digitized into a design to compensate for thread pull that would otherwise cause a 1-cm stitch (for example) to shrink to a .9-cm stitch, due to thread tension.

Registration - The proper relationship and alignment of all colors, stitches and other elements in a design.

Running stitch - Sometimes called 'walking' stitch, used for fine detail, outlining, and quickly covering space between separate design elements; used primarily for underlay.

SPM - Stitches-per-minute measurement used to rate embroidery machine production speed.

Satin stitch - Closely spaced stitches, similar to zigzag, except that they alternate between straight stitches and angled stitches (rather than all angled) of varying length, angle and density.

Scaling - Proportionately enlarging or reducing all elements in a digitized design.

Scanner - Means of converting artwork-either transmissive or reflective-into digital format, to then be further digitized or edited via computer.

Short-stitch filter - Digitizing-program feature that eliminates stitches shorter than a predetermined length, to reduce thread breaks.

Short stitching - Deliberately shorter stitches incorporated by digitizer to compensate for increasing stitch density in corners and curves.

Special fill - A function available in some digitizing software that automatically incorporates special patterns or textures into fill areas.

Stitch editing - The alteration of one or more stitches in an embroidery design, accomplished as a function of digitizing or editing.

Stock design - Similar to clip art, a 'generic' embroidery design available in digital format at a lower cost than a custom-digitized design.

Tackle twill - Text characters cut from twill fabric with an adhesive backing; typically used for athletic applications, the backing allows the character to be tacked in place-appliqué-wise-then its edges finished with zigzag stitches.

Tape - Archaic (rendered largely obsolete by digital technology) means of storing embroidery-design information on a paper (or other medium) tape with holes actually punched through its surface which are then 'read' by an automatic embroidery machine; sometimes used colloquially as a synonym for 'diskette.'

Tension - Proper top- and under-thread tension is critical in the correct formation of stitches (in some cases, adequate tension may be quickly assessed by examining the underside of an embroidery and observing a 1:2 ratio of bobbin thread to top thread).

Thread - Typically a fine-gauge synthetic-but also of natural materials, for certain applications-cord used for embroidery stitching; made of two or more filaments twisted together for strength and other characteristics; available in a wide array of colors and performance attributes, as well as various specialty threads (such as metallic).

Topping - Sometimes known as 'facing,' a material placed on top of the substrate fabric prior to embroidery-either hooped or otherwise held in place-intended to neutralize fabric-surface characteristics such as the heavy nap of fleece, or the wales of corduroy; after embroidery, excess topping is removed either manually, or through the application of heat or water.

Trimming - The removal of excess stitches, thread ends and backing during the finishing process.

Underlay - Stitches applied prior to other design elements to either A) neutralize fabric-surface characteristics (see also topping); or B) to create special design effects such as depth and dimensionality.

Zigzag - Stitches that progress in an alternating-angle (zigzag) fashion; typically used for final stitching on appliqué and tackle twill.

Embroidery Designs

Posted on 8:56 AM | By Didu | In , ,


Embroidery Designs

Embroidery is an art of materials (mostly fabrics) with designs stitched with together with yarn.

All purpose needles can be used f or most embroidery projects. Sewing machines can also be used to create machine embroidery designs. This type of embroidery is very popular for designs on jackets, sweatshirts, and sports wear etc. Mostly these embroidery designs machines are computerized that read digital embroidery designs files made by some specific software. Many machine embroidery designs can be found on internet and one can easily work on those by downloading designs. There are some machines only for embroidery designs purposes while others are combination of embroider design and sewing.

Making Embroidery Designs and Patterns

There is really nothing much to making embroidery designs in the embroidery digitizing process. Once we have selected the digitizing program, we can start on our embroidery projects. The design and editing the design is part of the process, of course. We start by picking out the artwork or design to digitize. Make sure the design is outlined by clean lines. We can then digitize this design as a vector file. Once we have set the design in a compatible file format, we can then upload it to the embroidery digitizing program. The design is useless if the program cannot recognize the file.

The less complex the design, the clearer the image. We can manually edit the design with our embroidery digitizing software. Embroidery is a craft that involves a lot of stitches and patterns that the design and the digitizing program should operate smoothly together.

The History of Embroidery and Its Modern Development

Posted on 8:49 AM | By Didu | In , , , ,


The History of Embroidery and Its Modern Development

Most people associate embroidery with a boring way to fill up a housewife's daily life. Embroidery has not only a long history. Different cultures formed different embroidery types. The styles of embroidery, which different nations invented, were passed on generations to generations and many of them have survived till nowadays.
We know of the embroidery work practiced by the ancient Egyptians. Also famous is the "raised" embroidery, practiced in the 16th century. It is better known as the Elizabethan embroidery. Still popular today is the Western European embroidery called crewel. Nowadays, embroidery has developed so far, that even the clumsiest novice can try and stitch something beautiful by using computer software or high-tech sewing machines.

An Introduction to the World of Embroidery

Embroidery just might be the domain of your grandmother, but it still had plenty of people who are interested in getting started in embroidery. As far back as Egyptian and Hebrew times individuals decorated their clothing with rich embroidery. The internet has allowed hobbyists and professionals from all over the world to mingle and discuss their latest embroidery projects. There are dozens of custom embroidery websites and people are always looking for free embroidery designs and embroidery digitizing.

In fact, A Google search for the term "embroidery" shows more than 70 merchants advertising their embroidery related products. If you like embroidery, there are a lot of online resources for you to explore.

Process of Embroidery Digitizing

Posted on 5:25 PM | By Didu | In , , , ,


Process of Embroidery Digitizing

Embroidery digitizing is really all so easy. Just three: the embroidery machine, the digitizing software, and the design and materials. With the digitized design saved to your machine's card, the machine will be able to start with the embroidery project.

We can say that embroidery has become an easy task with embroidery digitizing, right?

Stitch-on-Stitch With Embroidery Digitizing

Stitch-on-Stitch embroidery is something we'd like to see rise in popularity with embroidery digitizing. Computerized embroidery applying the tone-on-tone technique is not so common within the world of digitizing.

Stitch-on-Stitch embroidery is the a kind of embroidery involving an embroidery design that is of the same color as that of the fabric that it will be sewn on. Thought it is not s popular as the other kinds of embroidery used in embroidery digitizing and embroidery software too, tone-on-tone embroidery is still a fashionable trend in the industry. Tone-on-tone embroidery is not just used for soft designs like snowflakes on tablecloths and curtains. Of course, the women also get their share of classic designs with tone-on-tone embroidery. While embroidery digitizing can also accomplish tone-on-tone embroidery designs, there is competition with tone-on-tone monogramming. One main disadvantage in using tone-on-tone designs for your fabrics is that it could clash with the other designs the fabrics have. Don't forget that embroidery digitizing was made to enliven every embroidery work, even simple things like tone-on-tone designs.

Embroidery Software

Posted on 11:15 PM | By Didu | In , , , ,


Embroidery Designs Digitizing Software

Embroidery Magic 2 software program was created with multiple function lettering, editing and digitizing features for embroidery designs and was designed for those who have home embroidery machines and software. Features of Embroidery Magic 2

This embroidery software generates text stitch files from keyboard font styles. It also allows the user to manually digitize machine embroidery designs from the tools provided.

The Real View feature will allow you to see an embroidery design in a more realistic way than the digitizing view allows. EM 2 has 114 different fabric backgrounds with the capability of adding fabric choices by scanning a fabric and saving as a bmp file format in the "Fabric" folder of EM 2.

Embroidery Software - Embroidery Designs Made Easy

in the past, designs for embroidery were created by hand. Nowadays, designing for embroidery is made easier and most anyone can do it. All you have to do is use embroidery software.

The software lets the machine to the tracing for you and it creates great quality traces every time.

Some types

Digitizing Software: This type of software is one of popular ones used for embroidery. This software lets you create beautiful designs that are entirely your own. It also works well with pattern pills, clip arts, and stitch patterns to name some.

Lettering Software: This type of software allows you to make letters for your embroidery design.

What is Embroidery Digitizing?

Posted on 10:51 PM | By Didu | In , , , ,


What is Embroidery Digitizing?

When you're into embroidery and needlecraft you may have come across embroidery digitizing. Embroidery digitizing it the process of converting artwork into a stitch file that can be read by an embroidery machine and then sewn into fabric.

How do we go about embroidery digitizing? Pathing, or mapping, refers to the sequence of stitches in the design, from start to finish. A smoother design made in a shorter time costs less.

The digitizer then assigns stitch types to sections of the design. The underlay stitches will be added first. The underlay stitches should be done correctly because it helps the other remaining stitches have a smooth surface to embroider on. When not done correctly, the stitches will sink into the fabric or allow the shirt fabric to show through the design.

There are only three basic stitch types. These are run, satin, and fill stitches. There are many variations of these stitch types, however. There are types or fabrics that may only ruin the design. While being embroidered, a design may move and may cause some of the stitches to shift. Embroidery digitizing is indeed faster and easier.

How Embroidery Digitizing Works ?

Embroidery isn't all that hard these days, because of digitizing. Embroidery digitizing is basically putting in digital data into a computer with a digital file or scanned image and then creating stitch types, directions, density settings, and adjustments to make perfect embroidery. It's like recreating an image or a pre-made pattern with the help of a digitizing software or program and saving it as an embroidery machine code.

The first step towards embroidery digitizing is to know what type of embroidery software to use for the project. We can find many embroidery digitizing softwares on the Internet. Part of the digitizer's job is to make adjustments on the settings to make perfect embroidery.

Convert the size of the image to a bigger one, with the recommended size 3 to 6 times its actual size. See that the image is clean. This machine code is entered into the embroidery machine to be sewed onto the fabric.


Many people now experience easy and faster embroidery because of today's computer technology and embroidery digitizing.

Buy Website Traffic

Price of Digitizing


* Flat rate of US$2 per 1,000.
* Minimum charge of $5. Maximum Charge of US$150
* 12-24 Hour Turnaround.
* Free format conversions.
* Free editing in most, but not all cases, until you are satisfied.
* Quality guaranteed - you will not pay if you are not satisfied.
* Supply a scan of the sew-out with every digitized design.

Regarding embroidery price, please email us to ask our price list.


Editing


a. No charge for simple edits. Such as removing the original edition, enlarging or decreasing the size a bit.

b. Charge US$2.5/1000 stitches for complicated edits. Such as adding some text, enlarging or decreasing the size, which is far from the original size.

c. Charge US$2.5/1000stitches for complicated edits. Such as replacing the parts of the design or adding a new part to the design.


Production Details


To achieve the best results we will need to know the following

Garment type: Shirt, hat-constructed or soft, jacket, bag, etc.

Fabric type: Denim, twill, pique, cotton, jersey, leather, fleece, barber, etc.

Fabric weight: 6oz, 8oz, 14oz, etc.

Backing and/or topping type: Cut-away, tear-away, etc.

The exact size of the design: Width x Height

The placement of the design: Left chest, front center, back, sleeve, etc.

Colors desired


Re the payment, We offer manifold fashion to our customer,


details as follow:

A: Direct transfer to our bank account by BCA, for more account number detail please contact us.

B: Via Paypal, ( www.paypal.com )

C: Western Union or others, Maybe you have better advice, please kindly contact us: didu82006@yahoo.co.id


Available Format


Wilcom ES


*.EMB, *.DST, *.EXP, *.CND, *.DSB, *.DSZ, *.100, *.KSM, *.T01, *.T03, *.T04, *.T05, *.T09, *.T10, *.T15, *.ESL, *.SSS, *.SEW, *.JEF, *.HUS, *.PES, *.PEC, *.PCS, *.PCD, *.PCQ, *.CSD, *.EMT


Tajima


*.EMB, *.DST, *.T01, *.T03, *.T04, *.T05, *.T09, *.U??, *,DSZ, *.KSM, *.EXP, *.100


Richpeace


*.EDD, *.DST, *.DSB, *.DSZ, *.EXP, *.REC, *.ARC, *.E80, *.E00, *.PAT, *.SAS, *.PLS, *.DP, *.F1, *.DAT, *.MST, *.CAP, *.MIC, *.MIG, *.NC, *.QUT, *.QLT, *.WMF, *.EMF


Tajima DGML by Pulse


*.PXF,*.POF,*.PSF,*.DST,*.PES,*.PEC,*.T15……


Free Download Wilcom True Sizer

Free Download Wilcom True Sizer
Wilcom TrueSizer e1.5

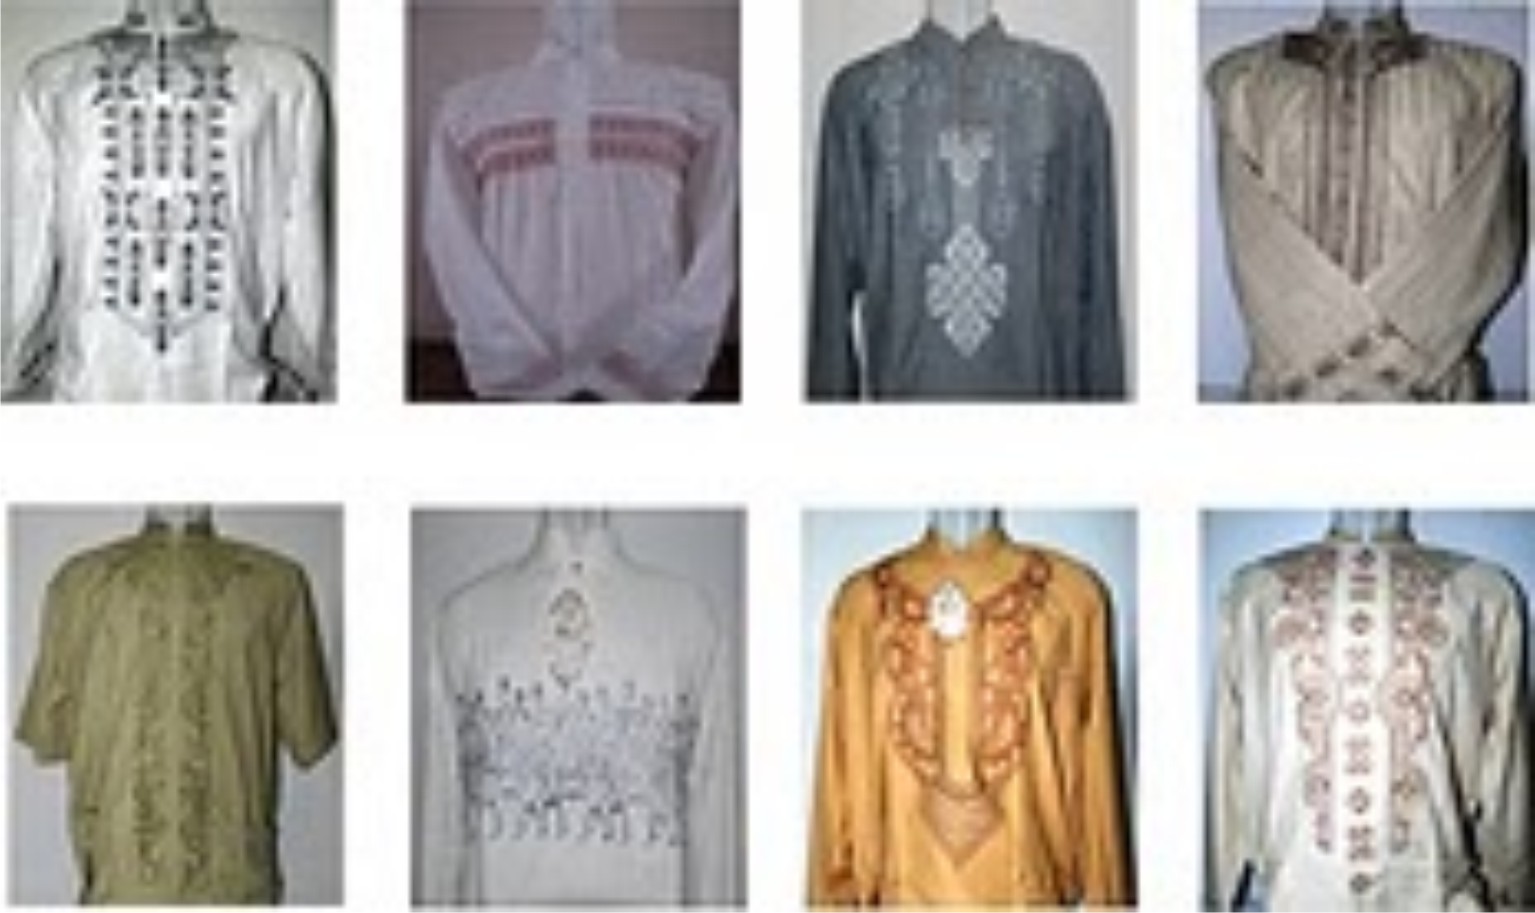
Moeslem wear Design

Moeslem wear Design
moslem wear design
embroidery digitizing blogarama - the blog directory Blog Directory Top Blogs Knitting Blogs - BlogCatalog Blog Directory TopOfBlogs Arts & Crafts (Furniture) - TOP.ORG

search